
Launch the FIRE VR module
Launch FIRE VR on your computer
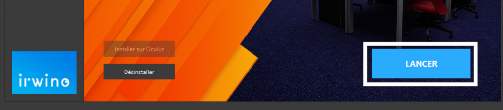
To launch FIRE VR, select it from the menu on the left, then simply click on "Launch" in the irwino application.
Launch the application on the Meta Quest 2 helmet
Check the connection between headset and computer
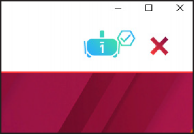
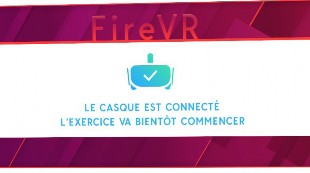
A successful connection will be indicated by the left-hand icon on the computer and the right-hand screen in the Meta Quest 2 headset:
If you encounter any problems at this stage, please check the following points:
- Your computer is connected to the router and using this network (disable wifi if necessary) on the 5G network.
- Your firewall/antivirus doesn't block the application (try disabling it temporarily or create an exception for the application)
- Headset and computer have the same version of the application
- If this doesn't work, try restarting the application on your computer and headset.
- If the problem persists, please contact us
Want to make sure you haven't forgotten anything when you launch a VR session?
Use this comprehensive checklist to make your life easier!
Managing a FIRE VR session
Choose an environment
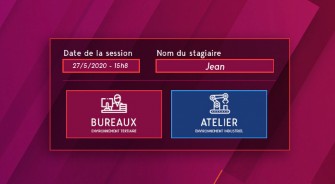
Depending on the options you activate when purchasing your license, you can choose between one and three training environments.
Click on the one you want to choose, then on "New session".
Set session parameters
Once you've chosen your environment, you can set up your session.
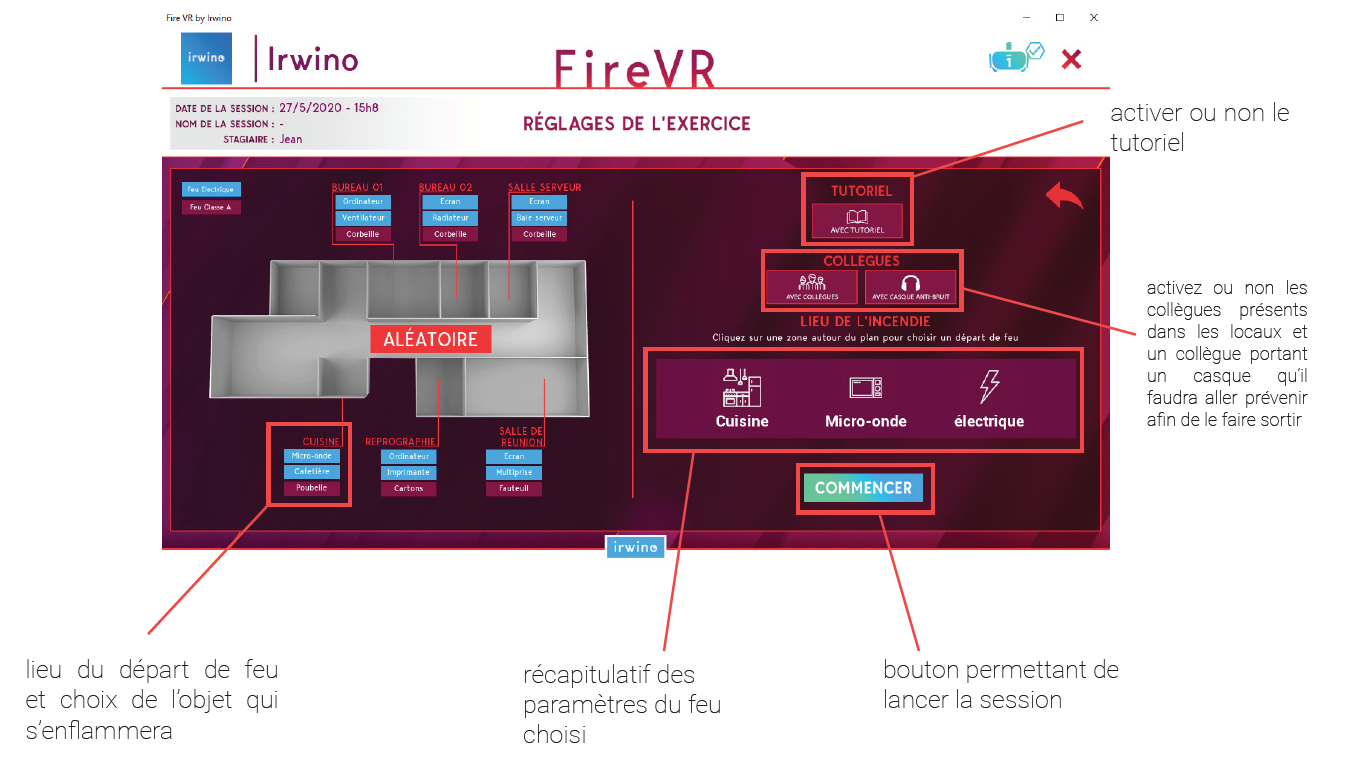
Choosing a fire start

This document lists all fire starts by environment.
Use it to help you choose the right starter for your teaching needs.
Using keyboard shortcuts

In keeping with our commitment to accessibility for all, keyboard shortcuts now enable you to perform certain actions with your trainee.
This document brings them together in a clear, easy-to-use diagram.
Managing session records

Click on "Manage sessions".

You can then activate or deactivate this feature and select your export folder.
Sessions will be readable in the form of a CSV file, containing all the data for one day of training.
Using Virtualized Fire Extinguishers ®.
Set-up tutorial œwork
Let us guide you through a step-by-step tutorial on how to prepare and use Virtualized® fire extinguishers for FIRE VR.
Let us guide you through a step-by-step tutorial on how to prepare and use Virtualized® fire extinguishers for FIRE VR.
Virtualized Fire Extinguisher ® maintenance
Need to replace a part with one of those supplied with your kit?
Access the parts replacement information below.
Gameplay Specific to U&J erp environment
Initial fire extinguisher activation: press button X or Y on the left-hand lever to activate the extinguisher.
When testing the extinguisher, if the bedroom door is closedWe were teleported to the front for a temperature check.
If the bedroom door is openwe are teleported into the room.
At the moment of teleportation into the room: if the patient has been evacuated, we are teleported next to the fire. If the patient has not been evacuated, we teleport next to him.
Patient evacuation Simply touch the patient with your hands or a part of the extinguisher to evacuate them. This eliminates the need to deactivate the extinguisher to perform this action. Once the evacuation is complete, we are teleported in front of the fire (in the case of a bathroom fire, to the automatically opened door).
Replacement of an extinguisher If a fire extinguisher has been deactivated (in front of the bedroom door, for example) and the trainer reactivates it (by placing the left joystick in its slot and pressing a round button), the extinguisher is automatically teleported to the player (who no longer needs to approach it with teleports).
Temperature check : with hand tracking activated, place your hand against the door of the room where the fire is located to read the temperature.
Deactivating an extinguisher : to deactivate a fire extinguisher and regain hand tracking, press the X or Y buttons on the left joystick (the extinguisher will then be frozen in its last position) and place the joystick on a flat surface so that it doesn't move.
A technical question? Getting stuck?

Besoin d'une réponse rapide ? Posez votre question à Irvinia, notre attachée d'assistance IA !

Pour toute autre demande, n'hésitez pas à contact our support team.
Elle est à votre service les jours ouvrés de 8h30 à 13h et de 14h à 17h00.